First-time setup
Open the dashboard
Where you open the dashboard depends on how you deployed:
| Deployment | URL |
|---|---|
| Managed hosting | Your instance URL (for example acme.getnakama.cloud) |
| Docker | http://localhost:4310 |
| Local development | http://localhost:3003 (web dev server proxies to the API) |
On a fresh install, Nakama redirects you to the setup wizard automatically.
Managed or Docker installs can skip the wizard by setting NAKAMA_SEED_ADMIN_EMAIL, NAKAMA_SEED_ADMIN_NAME, and NAKAMA_SEED_ADMIN_PASSWORD before first boot. See Docker → First-boot seed.
Step 1: Admin account
Create the first platform admin. This account can manage organizations, profiles, providers, and system settings.
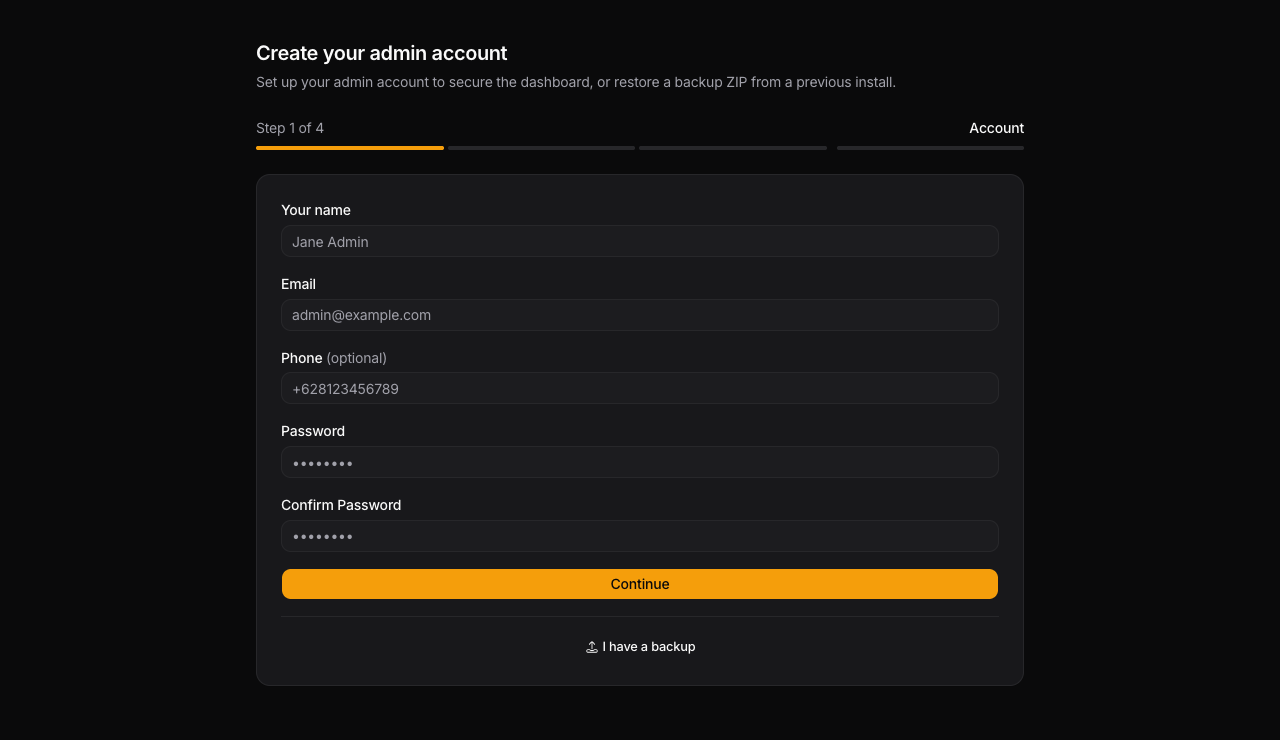
Fill in your name, email, and password, then click Continue.
Restore from backup instead
If you are moving to a new machine or reinstalling, you can skip creating a new admin account and restore a previous Nakama export ZIP on this step.
- Click Upload backup ZIP
- Choose your
.zipbackup and review the preview - Click Restore ZIP to replace the local data root
- Restart Nakama so it picks up the restored database
- Sign in with the account from your backup
If provider setup was already complete in the backup, Nakama opens chat after sign-in. Otherwise the setup wizard continues from the provider step.
See Backup and restore for what is included in export ZIPs and when to use dashboard import after setup is complete.
Step 2: Organization
Every workspace lives inside an organization. Name yours and choose a slug for URLs and API context.
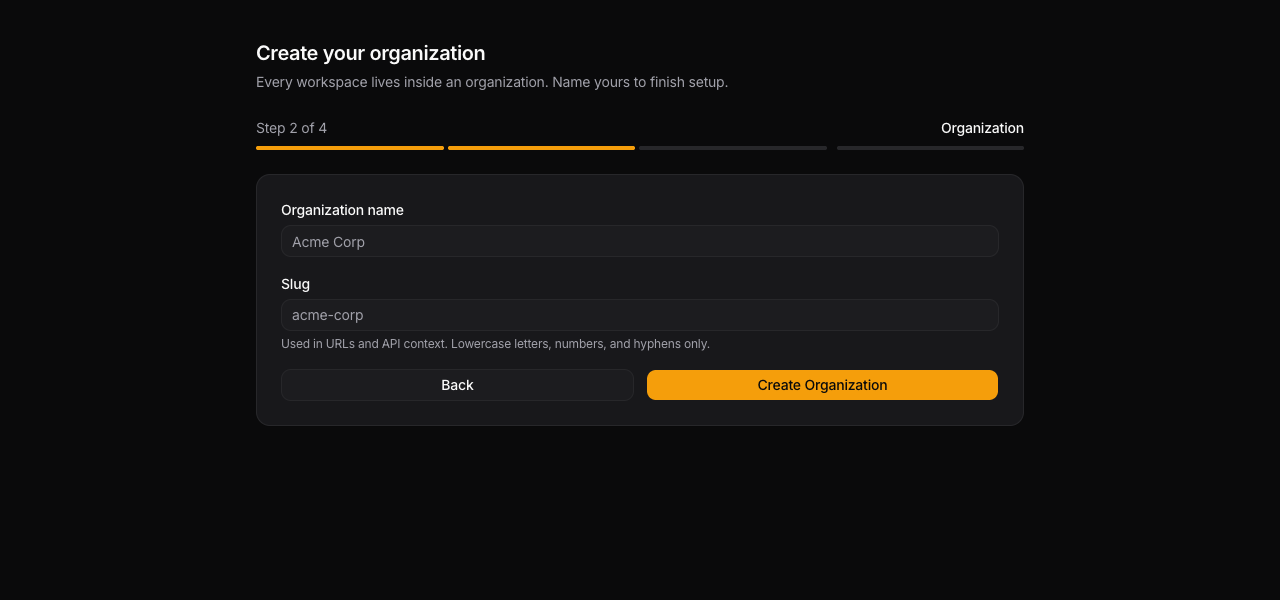
The slug must use lowercase letters, numbers, and hyphens only. Click Create Organization to save the admin account and org together.
Step 3: Provider
Add your first LLM provider and pick a default model. You can add more providers later in Control center → Agent tools → AI Providers.
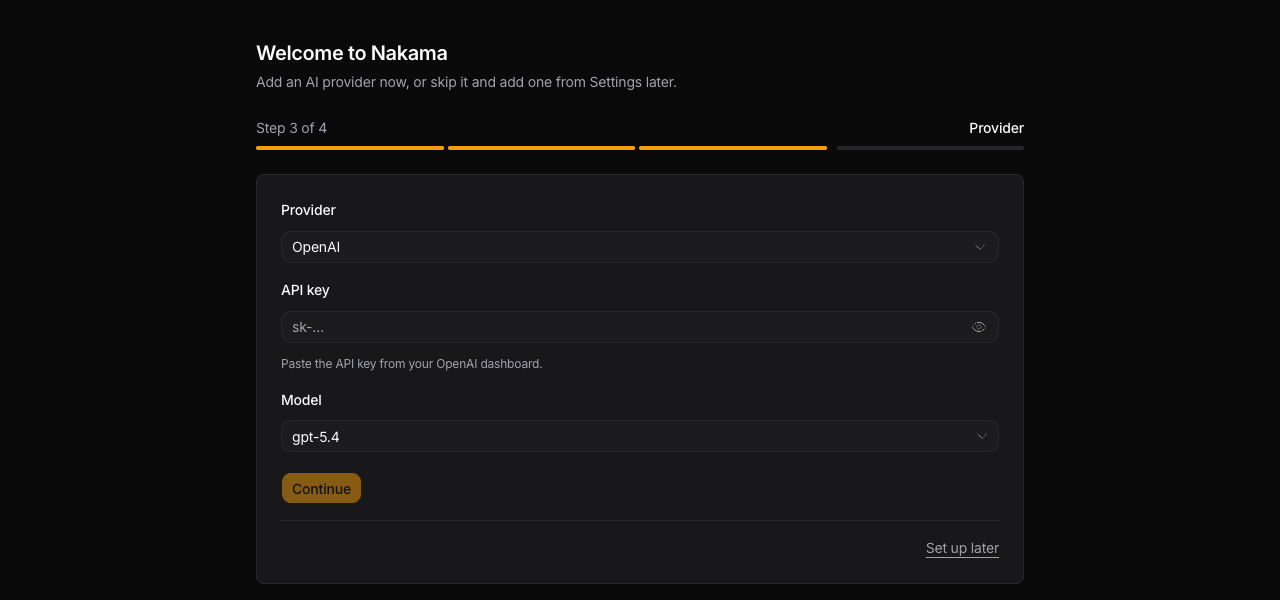
See Providers for supported backends and feature notes (web search, audio transcription, etc.).
Step 4: About you (optional)
Four short screens, one question each, instead of a form:
- What do you do? Your name (pre-filled from the account you just created), then a grid of roles (engineer, designer, product manager, founder, data, DevOps, marketing, sales, support, student, writer, or your own words). The role sets how deep and how technical replies get.
- What are you working on? Current projects and your stack. The examples and one-tap quick picks follow the role you chose, so a designer sees Figma and Framer while an SRE sees Kubernetes and Terraform.
- How should replies sound? Pick a reply language (your browser language is suggested), a length (concise or detailed) and a tone (casual or formal), each shown with a sample sentence, plus one Always and one Never rule. The language is stored as an Always rule, so it applies on every channel.
- What Nakama will remember. The exact Markdown that gets saved as
USER.md, editable by hand. Your timezone is set here too.
Answers and the resulting USER.md are saved for the authenticated user within this organization, then added to that user's conversations. They are not shared with every member of the organization. See How agent prompts work for where they land in the prompt.
Every field is optional and Set up later skips the whole step. Anything you had typed is kept as a draft in this browser and shows up again in Control center → Workspace → Settings. Press Enter in any field to move to the next screen. You can fill this in or change it at any time from Control center → Workspace → Settings, or from the account menu in the sidebar. That is also where to start if your install skipped the wizard through the first-boot seed.
Send your first message
After the provider step, Nakama opens chat with the default profile. Send a test message — you should get a reply within a few seconds.
If chat fails, reopen Control center → Agent tools → AI Providers and confirm the API key and per-agent model selection.
What to configure next
Most operators focus on four areas after setup:
- Organization — the tenant boundary
- Members — who can access that org
- Profiles — the bots people talk to
- Tools and skills — what each profile is allowed to do
See Overview for the mental model and Profiles for soul files, memory, and tool assignment.
Next steps
- Providers — supported LLM backends and API keys
- Profiles — define each bot's behavior
- Backup and restore — export and import your data root
- CLI — chat from the terminal
- Multi-tenancy — orgs, members, and roles
- Telegram — connect your first channel
Refreshing screenshots
Docs screenshots are captured with agent-browser against a fresh local install:
./docs/website/scripts/capture-setup-screenshots.shRequires agent-browser on your PATH and a free port (4312 by default).